Home > Transportation > Aeroplanes
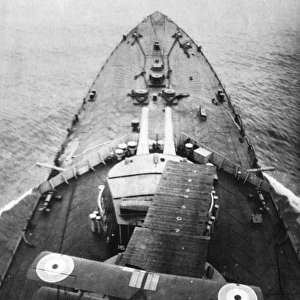
Sopwith Pup taking off from HMS Repulse, WW1

![]()
Wall Art and Photo Gifts from Mary Evans Picture Library
Sopwith Pup taking off from HMS Repulse, WW1
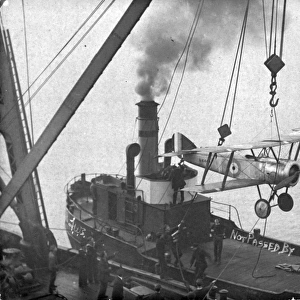
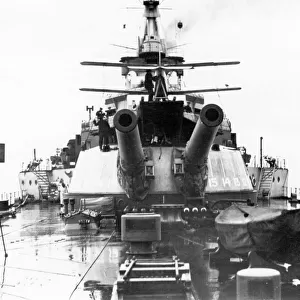
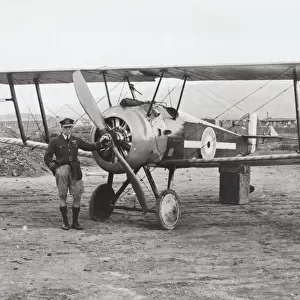
A Sopwith Pup biplane taking off from the B turret of HMS Repulse during the First World War. Date: October 1918
Mary Evans Picture Library makes available wonderful images created for people to enjoy over the centuries
Media ID 7200475
© Mary Evans Picture Library 2015 - https://copyrighthub.org/s0/hub1/creation/maryevans/MaryEvansPictureID/10543545
Air Craft Bi Plane Repulse Sopwith Take Off Taking Turret War Time Ww 1
FEATURES IN THESE COLLECTIONS
> Mary Evans Prints Online
> WWI Aircraft
EDITORS COMMENTS
This image captures the moment of takeoff for a Sopwith Pup biplane from the B turret of HMS Repulse during the final months of the First World War. Dated October 1918, this photograph offers a unique glimpse into the maritime aviation history of the Great War. The Sopwith Pup, a single-seat biplane, was a popular choice for the Royal Naval Air Service due to its agility and maneuverability. The HMS Repulse, a Revenge-class battleship, was one of the most powerful warships of its time and played a significant role in the British naval fleet. The integration of aircraft onboard battleships like the Repulse marked a turning point in naval warfare, providing enhanced reconnaissance, communication, and offensive capabilities. With the war entering its final stages, the combination of the Sopwith Pup and HMS Repulse was a formidable force. The plane's takeoff from the turret was a complex process requiring precise timing and coordination between the pilot and the ship's crew. The image showcases the determination and skill of the aviator as he launches into the air, leaving the turret behind, ready to contribute to the ongoing military efforts. This photograph is an essential piece of history, illustrating the innovative advancements in both naval and aviation technology during the First World War. It serves as a reminder of the pivotal role that aircraft played in the evolution of naval warfare and the significant impact on the outcome of the war.
MADE IN AUSTRALIA
Safe Shipping with 30 Day Money Back Guarantee
FREE PERSONALISATION*
We are proud to offer a range of customisation features including Personalised Captions, Color Filters and Picture Zoom Tools
FREE COLORIZATION SERVICE
You can choose advanced AI Colorization for this picture at no extra charge!
SECURE PAYMENTS
We happily accept a wide range of payment options so you can pay for the things you need in the way that is most convenient for you
* Options may vary by product and licensing agreement. Zoomed Pictures can be adjusted in the Cart.