Home > Arts > Street art graffiti > Portraits > Fine art
Where Does this Wheel Go? (colour litho)
")
![]()
Wall Art and Photo Gifts from Fine Art Finder
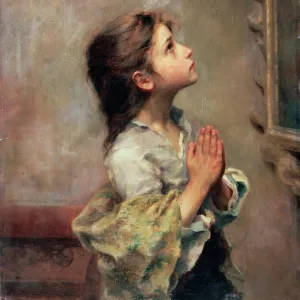
Where Does this Wheel Go? (colour litho)
5197224 Where Does this Wheel Go? (colour litho) by English School, (19th century); Private Collection; (add.info.: Where Does this Wheel Go? Illustration for A Night In The Woods, and Other Tales and Sketches, by James Weston (Sampson Low, c 1890).); © Look and Learn
Media ID 22590596
© Look and Learn / Bridgeman Images
Baffled Clock Clocks Confused Confusing Confusion Doubt Employment Fixing Glasses Horologist Horology Jobs Occupations Puzzled Repairer Repairing Timepiece Tools Workshop Workshops Puzzling
FEATURES IN THESE COLLECTIONS
> Arts
> Artists
> Related Images
> Arts
> Street art graffiti
> Portraits
> Fine art
> Fine Art Finder
> Artists
> Edmund Richard White
> Fine Art Finder
> Artists
> English School
EDITORS COMMENTS
This print titled "Where Does this Wheel Go?" captures a moment of intrigue and confusion. The portrait features a man, wearing glasses, who appears deeply puzzled as he contemplates the placement of a wheel in his workshop. Surrounded by various tools and an intricate clock, he is engrossed in repairing the timepiece. The image evokes a sense of mystery and uncertainty, as the man's expression reflects his doubt and bafflement. His occupation as a horologist or clock repairer becomes evident through the presence of clocks and other timekeeping devices in his workshop. However, this particular task seems to have him stumped. The vibrant colors used in this 19th-century lithograph add depth to the scene, enhancing its visual appeal. The attention to detail is remarkable; every element contributes to creating an atmosphere filled with curiosity. "Where Does this Wheel Go?" was originally created as an illustration for James Weston's book "A Night In The Woods, and Other Tales and Sketches". This artwork showcases not only the technical skill involved in horology but also highlights the challenges faced by those working diligently behind-the-scenes to keep our timepieces ticking accurately. As we gaze upon this mesmerizing print from Bridgeman Images' private collection, we are reminded that even experts can be confounded at times. It serves as a testament to both human fallibility and relentless pursuit of knowledge within various occupations – where confusion often leads us closer to finding solutions.
MADE IN AUSTRALIA
Safe Shipping with 30 Day Money Back Guarantee
FREE PERSONALISATION*
We are proud to offer a range of customisation features including Personalised Captions, Color Filters and Picture Zoom Tools
SECURE PAYMENTS
We happily accept a wide range of payment options so you can pay for the things you need in the way that is most convenient for you
* Options may vary by product and licensing agreement. Zoomed Pictures can be adjusted in the Cart.