Home > Arts > Street art graffiti > Digital art > Digital paintings
The Great Sesostris (Rameses II) in the Battle of Kadesch (engraving)
 in the Battle of Kadesch (engraving)")
![]()
Wall Art and Photo Gifts from Fine Art Finder
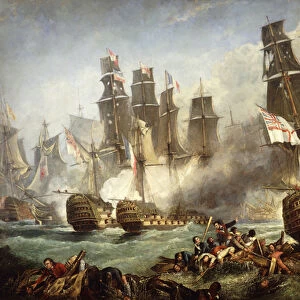
The Great Sesostris (Rameses II) in the Battle of Kadesch (engraving)
655620 The Great Sesostris (Rameses II) in the Battle of Kadesch (engraving) by English School, (19th century); Private Collection; (add.info.: The Great Sesostris (Rameses II) in the Battle of Kadesch. Illustration from The Illustrated History of the World (Ward Lock, c 1880). Digitally cleaned image.); © Look and Learn; English, out of copyright
Media ID 22610988
© Look and Learn / Bridgeman Images
FEATURES IN THESE COLLECTIONS
> Arts
> Street art graffiti
> Digital art
> Digital paintings
> Fine Art Finder
> Artists
> English School
> Fine Art Finder
> Temp Classification
> Historic
> Battles
> Related Images
EDITORS COMMENTS
This engraving, titled "The Great Sesostris (Rameses II) in the Battle of Kadesch" takes us back to ancient Egypt and immerses us in a historic moment. Created by an English School artist in the 19th century, this print captures the essence of Rameses II's legendary military prowess. At first glance, we are drawn to the grandeur of Rameses II himself. The pharaoh stands tall and commanding on his chariot, exuding strength and determination. His regal attire reflects his status as a powerful ruler while his focused gaze reveals his unwavering commitment to victory. The Battle of Kadesch unfolds before our eyes with remarkable detail. The chaos and intensity of war are vividly depicted through charging horses, clashing weapons, and billowing dust clouds. This scene transports us right into the heart of battle - a testament to both the artist's skill and their dedication to historical accuracy. "The Illustrated History of the World" serves as an invaluable source for understanding pivotal moments like these. Through this engraving, we gain insight into one of ancient Egypt's most significant battles – a clash between Rameses II's forces and those led by King Muwatalli II of Hatti. Thanks to digital restoration techniques employed on this image, its original splendor is preserved for generations to come. As we admire this artwork from Bridgeman Images' private collection today, let it serve as a reminder that history lives on
MADE IN AUSTRALIA
Safe Shipping with 30 Day Money Back Guarantee
FREE PERSONALISATION*
We are proud to offer a range of customisation features including Personalised Captions, Color Filters and Picture Zoom Tools
SECURE PAYMENTS
We happily accept a wide range of payment options so you can pay for the things you need in the way that is most convenient for you
* Options may vary by product and licensing agreement. Zoomed Pictures can be adjusted in the Cart.