Fraud Blocker Skip to main content

2nd Boer War Collection (page 2)

"The 2nd Boer War: A Glimpse into the Heroic Struggles and Determination" Amidst the chaos of the 2nd Boer War

Background image2nd Boer War Collection: The British Occupation of Bloemfontein - An evening concert in market square by the pipes

The British Occupation of Bloemfontein - An evening concert in market square by the pipes
STC363445 The British Occupation of Bloemfontein - An evening concert in market square by the pipes of the Highland Brigade (litho) by Forestier

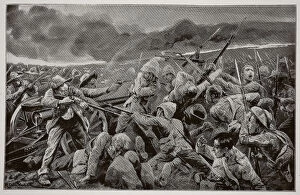
Background image2nd Boer War Collection: The Relief of Ladysmith - The Last Rush at Hlangwane Hill (litho)

The Relief of Ladysmith - The Last Rush at Hlangwane Hill (litho)
STC363443 The Relief of Ladysmith - The Last Rush at Hlangwane Hill (litho) by Bull, Rene(1872-1942); Private Collection; (add.info.: With the British advance)

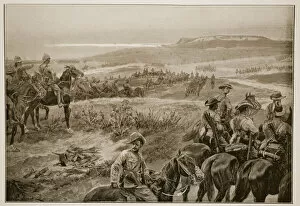
Background image2nd Boer War Collection: The Dash for Kimberley - The 10th Hussars Crossing Klip Drift, after a sketch by G. D

The Dash for Kimberley - The 10th Hussars Crossing Klip Drift, after a sketch by G. D
STC363438 The Dash for Kimberley - The 10th Hussars Crossing Klip Drift, after a sketch by G.D. Giles (fl.1890) (litho) by Charlton

Background image2nd Boer War Collection: Lady Minto presenting Colours to Herchmers Horse, on leaving Ottawa

Lady Minto presenting Colours to Herchmers Horse, on leaving Ottawa
STC363428 Lady Minto presenting Colours to Herchmers Horse, on leaving Ottawa, 19th January 1900, from a photograph by J.C

Background image2nd Boer War Collection: After the Battle: A melancholy return, illustration from

After the Battle: A melancholy return, illustration from
STC403965 After the Battle: A melancholy return, illustration from Battles of the Nineteenth Century, Vol. VI: The Boer War of 1899-1900 by Archibald Forbes, G.A

Background image2nd Boer War Collection: The Ambuscade at Koorn Spruit, illustration from Battles of the Nineteenth Century

The Ambuscade at Koorn Spruit, illustration from Battles of the Nineteenth Century
STC403977 The Ambuscade at Koorn Spruit, illustration from Battles of the Nineteenth Century, Vol. VI: The Boer War of 1899-1900 by Archibald Forbes, G.A

Background image2nd Boer War Collection: The charge of the Inniskillings: the Battle of Pieters Hill

The charge of the Inniskillings: the Battle of Pieters Hill
STC403972 The charge of the Inniskillings: the Battle of Pieters Hill, illustration from Battles of the Nineteenth Century, Vol. VI: The Boer War of 1899-1900 by Archibald Forbes, G.A

Background image2nd Boer War Collection: Roughing it by the Modder River: the Officers Mess of the 3rd Grenadier Guards

Roughing it by the Modder River: the Officers Mess of the 3rd Grenadier Guards
STC403961 Roughing it by the Modder River: the Officers Mess of the 3rd Grenadier Guards, illustration from Battles of the Nineteenth Century, Vol

Background image2nd Boer War Collection: The Engagement at Vlakfontein: The Derbyshires re-taking the guns at the point of

The Engagement at Vlakfontein: The Derbyshires re-taking the guns at the point of
STC363413 The Engagement at Vlakfontein: The Derbyshires re-taking the guns at the point of the bayonet (litho) by Woodville

Background image2nd Boer War Collection: The City of London Imperial Volunteers supporting General Hamilton

The City of London Imperial Volunteers supporting General Hamilton
STC363477 The City of London Imperial Volunteers supporting General Hamiltons left flank in the action at Doornkop on the 29th May, 1900 (litho) by Fripp

Background image2nd Boer War Collection: The great advance: Royal Horse Artillery (Cavalry Division) Crossing the Vaal (litho)

The great advance: Royal Horse Artillery (Cavalry Division) Crossing the Vaal (litho)
STC363433 The great advance: Royal Horse Artillery (Cavalry Division) Crossing the Vaal (litho) by Woodville, Richard Caton II (1856-1927) (after); Private Collection; (add.info)

Background image2nd Boer War Collection: Charge of the 5th Lancers at the Battle of Elandslaagte (litho)

Charge of the 5th Lancers at the Battle of Elandslaagte (litho)
STC363408 Charge of the 5th Lancers at the Battle of Elandslaagte (litho) by Woodville, Richard Caton II (1856-1927) (after); Private Collection; (add.info)

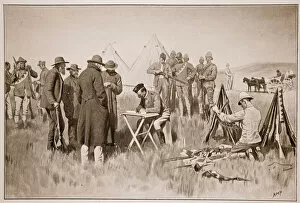
Background image2nd Boer War Collection: Boers taking the oath of neutrality at Greylingstad, from a sketch by Lieut. E. B. Knox, R

Boers taking the oath of neutrality at Greylingstad, from a sketch by Lieut. E. B. Knox, R
STC363475 Boers taking the oath of neutrality at Greylingstad, from a sketch by Lieut. E.B. Knox, R.A.M.C. (litho) by Paget

Background image2nd Boer War Collection: Going out to the attack on Spion Kop on January 24th (litho)

Going out to the attack on Spion Kop on January 24th (litho)
STC363469 Going out to the attack on Spion Kop on January 24th (litho) by Woodville, Richard Caton II (1856-1927) (after); Private Collection; (add.info)

Background image2nd Boer War Collection: A Reconnaissance in force with General Frenchs Cavalry near Colesberg (litho)

A Reconnaissance in force with General Frenchs Cavalry near Colesberg (litho)
STC363468 A Reconnaissance in force with General Frenchs Cavalry near Colesberg (litho) by Woodville, Richard Caton II (1856-1927) (after); Private Collection; (add.info)

Background image2nd Boer War Collection: 'No surrender!'The Defence of Fort Itala on September 26, 1901 (litho)

"No surrender!"The Defence of Fort Itala on September 26, 1901 (litho)
STC363466 " No surrender!" The Defence of Fort Itala on September 26, 1901 (litho) by Woodville, Richard Caton II (1856-1927) (after); Private Collection; (add.info)

Background image2nd Boer War Collection: The Battle of Majuba Hill (litho)

The Battle of Majuba Hill (litho)
STC363447 The Battle of Majuba Hill (litho) by Woodville, Richard Caton II (1856-1927) (after); Private Collection; (add.info.: Battle of Majuba Hill (27th February 1881)

Background image2nd Boer War Collection: Bringing up the five-inch siege guns, illustration from

Bringing up the five-inch siege guns, illustration from
STC403976 Bringing up the five-inch siege guns, illustration from Battles of the Nineteenth Century, Vol. VI: The Boer War of 1899-1900 by Archibald Forbes, G.A

Background image2nd Boer War Collection: Field Artillery coming into action, illustration from

Field Artillery coming into action, illustration from
STC403958 Field Artillery coming into action, illustration from Battles of the Nineteenth Century, Vol. VI: The Boer War of 1899-1900 by Archibald Forbes, G.A

Background image2nd Boer War Collection: Running the gauntlet: a Lancer Patrol under cross fire, illustration from

Running the gauntlet: a Lancer Patrol under cross fire, illustration from
STC403957 Running the gauntlet: a Lancer Patrol under cross fire, illustration from Battles of the Nineteenth Century, Vol. VI: The Boer War of 1899-1900 by Archibald Forbes, G.A

Background image2nd Boer War Collection: The Mishap to the Victorians at Wilmansrust, June 12, 1901 (litho)

The Mishap to the Victorians at Wilmansrust, June 12, 1901 (litho)
STC363465 The Mishap to the Victorians at Wilmansrust, June 12, 1901 (litho) by Woodville, Richard Caton II (1856-1927) (after); Private Collection; (add.info)

Background image2nd Boer War Collection: Paul Kruger, President of the Transvaal Republic (sepia photo)

Paul Kruger, President of the Transvaal Republic (sepia photo)
STC363448 Paul Kruger, President of the Transvaal Republic (sepia photo) by Elliott & Fry Studio (fl.1860-90); Private Collection; (add.info.: Stephanus Johannes Paulus Kruger (1825-1904)

Background image2nd Boer War Collection: The Formal Surrender of Bloemfontein, from a sketch by W. B. Wollen RI (1857-1936) (litho)

The Formal Surrender of Bloemfontein, from a sketch by W. B. Wollen RI (1857-1936) (litho)
STC363441 The Formal Surrender of Bloemfontein, from a sketch by W.B. Wollen RI (1857-1936) (litho) by Finnemore, Joseph (1860-1939); Private Collection; (add.info)

Background image2nd Boer War Collection: Capture of Boer Convoy by General Frenchs Troops near Kimberley (litho)

Capture of Boer Convoy by General Frenchs Troops near Kimberley (litho)
STC363439 Capture of Boer Convoy by General Frenchs Troops near Kimberley (litho) by Wood, Stanley L. (1866-1928); Private Collection; (add.info)

Background image2nd Boer War Collection: Taking the 47 naval gun across the Tugela (litho)

Taking the 47 naval gun across the Tugela (litho)
STC363426 Taking the 47 naval gun across the Tugela (litho) by Finnemore, Joseph (1860-1939); Private Collection; (add.info.: The Second Boer War (1899-1902); ); The Stapleton Collection; British

Background image2nd Boer War Collection: The night charge of the 19th Hussars near Lydenberg on 7th November, 1900 (litho)

The night charge of the 19th Hussars near Lydenberg on 7th November, 1900 (litho)
STC363422 The night charge of the 19th Hussars near Lydenberg on 7th November, 1900 (litho) by Woodville, Richard Caton II (1856-1927) (after); Private Collection; (add.info)

Background image2nd Boer War Collection: General Joubert (sepia photo)

General Joubert (sepia photo)
STC363409 General Joubert (sepia photo) by Elliott & Fry Studio (fl.1860-90); Private Collection; (add.info.: Petrus Jacobus Joubert (1834-1900)

Background image2nd Boer War Collection: General De Wet (sepia photo)

General De Wet (sepia photo)
STC363420 General De Wet (sepia photo) by South African Photographer, (19th century); Private Collection; (add.info.: Christiaan Rudolph de Wet (1854-1922), Boer General

Background image2nd Boer War Collection: Night attack on a Boer convoy by mounted infantry under Colonel Williams

Night attack on a Boer convoy by mounted infantry under Colonel Williams
STC363416 Night attack on a Boer convoy by mounted infantry under Colonel Williams, after a drawing by a British officer (litho) by Charlton

Background image2nd Boer War Collection: Charge of the Bushmen and New Zealanders on the Boer guns, near Klerksdorp

Charge of the Bushmen and New Zealanders on the Boer guns, near Klerksdorp
STC363412 Charge of the Bushmen and New Zealanders on the Boer guns, near Klerksdorp, 24th March 1901 (litho) by Woodville

Background image2nd Boer War Collection: The Battle of Colenso: the loss of our guns, illustration from

The Battle of Colenso: the loss of our guns, illustration from
STC403962 The Battle of Colenso: the loss of our guns, illustration from Battles of the Nineteenth Century, Vol. VI: The Boer War of 1899-1900 by Archibald Forbes, G.A

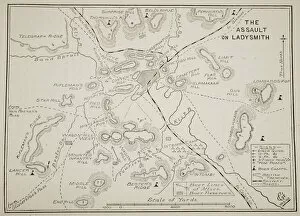
Background image2nd Boer War Collection: Plan of the Assault on Ladysmith (litho)

Plan of the Assault on Ladysmith (litho)
STC373407 Plan of the Assault on Ladysmith (litho) by English School, (19th century); Private Collection; (add.info.: Siege of Ladysmith, 30th October 1899 to 28th February 1900)

Background image2nd Boer War Collection: Majuba Hill (litho)

Majuba Hill (litho)
STC373397 Majuba Hill (litho) by English School, (19th century); Private Collection; (add.info.: Battle of Majuba Hill (27th February 1881)

Background image2nd Boer War Collection: General Ian Hamilton thanking the Gordons for their attack at the battle of Doornkop

General Ian Hamilton thanking the Gordons for their attack at the battle of Doornkop
STC363434 General Ian Hamilton thanking the Gordons for their attack at the battle of Doornkop (litho) by Begg, Samuel (fl.1886-1916); Private Collection; (add.info)

Background image2nd Boer War Collection: Mafeking: The Wolf that never Sleeps, from material supplied by Major F. D

Mafeking: The Wolf that never Sleeps, from material supplied by Major F. D
STC363431 Mafeking: The Wolf that never Sleeps, from material supplied by Major F.D. Baillie, Correspondent of the Morning Post (litho) by Hatherell, W

Background image2nd Boer War Collection: The surrender of Kroonstadt: Troops marching past Lord Roberts and staff

The surrender of Kroonstadt: Troops marching past Lord Roberts and staff
STC363430 The surrender of Kroonstadt: Troops marching past Lord Roberts and staff, from a sketch by Melton Prior (1845-1910) (litho) by Begg

Background image2nd Boer War Collection: With General French: New Zealanders saving a picket of the Yorkshire Regiment near

With General French: New Zealanders saving a picket of the Yorkshire Regiment near
STC363429 With General French: New Zealanders saving a picket of the Yorkshire Regiment near Slingersfontein on January 15, from a sketch by G.D

Background image2nd Boer War Collection: The Gallant Bugler of Fort Itala (litho)

The Gallant Bugler of Fort Itala (litho)
STC363417 The Gallant Bugler of Fort Itala (litho) by Woodville, Richard Caton II (1856-1927) (after); Private Collection; (add.info)

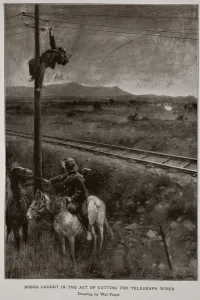
Background image2nd Boer War Collection: Boers Caught in the act of cutting the telegraph wires (litho)

Boers Caught in the act of cutting the telegraph wires (litho)
STC363415 Boers Caught in the act of cutting the telegraph wires (litho) by Paget, Walter Stanley (1861-1908); Private Collection; (add.info)

Background image2nd Boer War Collection: The attack on game tree fort, illustration from Battles of the Nineteenth Century

The attack on game tree fort, illustration from Battles of the Nineteenth Century
STC403978 The attack on game tree fort, illustration from Battles of the Nineteenth Century, Vol. VI: The Boer War of 1899-1900 by Archibald Forbes, G.A

Background image2nd Boer War Collection: On the heels of De Wet: Mounted Infantry attacking a waggon train

On the heels of De Wet: Mounted Infantry attacking a waggon train
STC403932 On the heels of De Wet: Mounted Infantry attacking a waggon train, illustration from Battles of the Nineteenth Century: Vol. VII, The Boer War 1900-1901 by Archibald Forbes, G.A

Background image2nd Boer War Collection: The Relief of Ladysmith: Tommy Atkins in request, illustration from

The Relief of Ladysmith: Tommy Atkins in request, illustration from
STC403974 The Relief of Ladysmith: Tommy Atkins in request, illustration from Battles of the Nineteenth Century, Vol. VI: The Boer War of 1899-1900 by Archibald Forbes, G.A

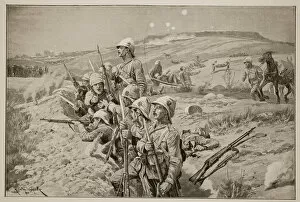
Background image2nd Boer War Collection: 'Fix Bayonets!'In the Trenches at Ladysmith, illustration from

"Fix Bayonets!"In the Trenches at Ladysmith, illustration from
STC403963 " Fix Bayonets!" In the Trenches at Ladysmith, illustration from Battles of the Nineteenth Century, Vol. VI: The Boer War of 1899-1900 by Archibald Forbes, G.A

Background image2nd Boer War Collection: Placard erected by Mr Rhodes, photograph attributed to F. H. Hancox, Kimberley (b / w photo)

Placard erected by Mr Rhodes, photograph attributed to F. H. Hancox, Kimberley (b / w photo)
STC363473 Placard erected by Mr Rhodes, photograph attributed to F.H. Hancox, Kimberley (b/w photo) by South African Photographer

Background image2nd Boer War Collection: The Battle of Colenso - The last desperate attempt to save the guns of the 14th

The Battle of Colenso - The last desperate attempt to save the guns of the 14th
STC363461 The Battle of Colenso - The last desperate attempt to save the guns of the 14th and 66th batteries, 1900 (litho) by Paget

Background image2nd Boer War Collection: From Frere to Chieveley - difficulties of transport (litho)

From Frere to Chieveley - difficulties of transport (litho)
STC363460 From Frere to Chieveley - difficulties of transport (litho) by Woodville, Richard Caton II (1856-1927) (after); Private Collection; (add.info)

Background image2nd Boer War Collection: Fix bayonets! Repelling an attack from the trenches around Ladysmith, 1900 (litho)

Fix bayonets! Repelling an attack from the trenches around Ladysmith, 1900 (litho)
STC363459 Fix bayonets! Repelling an attack from the trenches around Ladysmith, 1900 (litho) by Woodville, Richard Caton II (1856-1927) (after); Private Collection; (add.info)

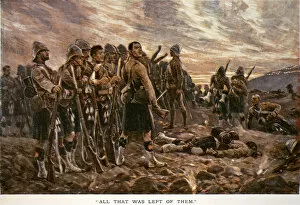
Background image2nd Boer War Collection: All that was left of them : The Black Watch after the Battle of Magersfontein

All that was left of them : The Black Watch after the Battle of Magersfontein
STC363457 All that was left of them : The Black Watch after the Battle of Magersfontein, 1899 (colour litho) by Woodville


All Professionally Made to Order for Quick Shipping

"The 2nd Boer War: A Glimpse into the Heroic Struggles and Determination" Amidst the chaos of the 2nd Boer War, a Household Cavalry-Captain from the esteemed 2nd Life Guards stands tall in his resolute stance. The year is 1900, and Gregory & Co immortalize this brave warrior through their artistic lens. In another corner of Cape Town, the Cape Town Highlanders march with pride. JE Bruton captures their unwavering spirit as they prepare to face the challenges that lie ahead in this tumultuous time. Lord Methuen emerges as an inspiring figure amidst adversity at Tweebosch in 1902. Charles Mills Sheldon's masterpiece illustrates his valiant efforts to rally his broken forces, showcasing leadership that refuses to waver even in dire circumstances. The Night Charge of the 19th Hussars near Lydenberg on November 7th, 1900 becomes a legendary tale etched by an anonymous creator. This breathtaking artwork encapsulates bravery under cover of darkness as these soldiers charge forward fearlessly. Major-General Hector A. Macdonald, C. B. , takes center stage in Heath's portrait from 1900. His distinguished presence exemplifies courage and resilience during this arduous conflict. General Sir Bindon Blood personifies strength and determination in Donald McCracken's portrayal from 1902. As a prominent military leader during this war, he embodies strategic brilliance while navigating treacherous terrains. John Charlton brings alive "The Fight at Brakenlaagte: Boers Charging" from 1902—a vivid depiction capturing intense moments where both sides clash fiercely for victory on unforgiving battlegrounds. Walter Paget unveils an intriguing scene titled "Boers Caught in the Act of Cutting Telegraph Wires" from 1902—an image that exposes cunning tactics employed by resourceful Boer fighters.