Fraud Blocker Skip to main content

Beatrice Clay Collection

"Beatrice Clay

Background imageBeatrice Clay Collection: Then they went to Sir Galahad, 1905. Artist: Dora Curtis

Then they went to Sir Galahad, 1905. Artist: Dora Curtis
Then they went to Sir Galahad, 1905. An illustration from Stories of King Arthur and the Round Table by Beatrice Clay, 1st Edition, 1905

Background imageBeatrice Clay Collection: How Mordred plotted against Sir Launcelot, 1905. Artist: Dora Curtis

How Mordred plotted against Sir Launcelot, 1905. Artist: Dora Curtis
How Mordred plotted against Sir Launcelot, 1905. An illustration from Stories of King Arthur and the Round Table by Beatrice Clay, 1st Edition, 1905

Background imageBeatrice Clay Collection: Found the Queen Dead, 1905. Artist: Dora Curtis

Found the Queen Dead, 1905. Artist: Dora Curtis
Found the Queen Dead, 1905. An illustration from Stories of King Arthur and the Round Table by Beatrice Clay, 1st Edition, 1905

Background imageBeatrice Clay Collection: Sir Galahad at the Abbey, 1905. Artist: Dora Curtis

Sir Galahad at the Abbey, 1905. Artist: Dora Curtis
Sir Galahad at the Abbey, 1905. Sir Galahad, a Knight of the Round Table, was the son of Sir Lancelot and achiever of the Holy Grail

Background imageBeatrice Clay Collection: The Three Queens, 1905. Artist: Dora Curtis

The Three Queens, 1905. Artist: Dora Curtis
The Three Queens, 1905. An illustration from Stories of King Arthur and the Round Table by Beatrice Clay, 1st Edition, 1905

Background imageBeatrice Clay Collection: Rushed Upon the Astonished Throng, 1905. Artist: Dora Curtis

Rushed Upon the Astonished Throng, 1905. Artist: Dora Curtis
Rushed Upon the Astonished Throng, 1905. An illustration from Stories of King Arthur and the Round Table by Beatrice Clay, 1st Edition, 1905

Background imageBeatrice Clay Collection: Queen Guenevere, 1905. Artist: Dora Curtis

Queen Guenevere, 1905. Artist: Dora Curtis
Queen Guenevere, 1905. An illustration from Stories of King Arthur and the Round Table by Beatrice Clay, 1st Edition, 1905

Background imageBeatrice Clay Collection: The Barge floated down the River, 1905. Artist: Dora Curtis

The Barge floated down the River, 1905. Artist: Dora Curtis
The Barge floated down the River, 1905. An illustration from Stories of King Arthur and the Round Table by Beatrice Clay, 1st Edition, 1905

Background imageBeatrice Clay Collection: How Sir Launcelot saw the Holy Grail, 1905. Artist: Dora Curtis

How Sir Launcelot saw the Holy Grail, 1905. Artist: Dora Curtis
How Sir Launcelot saw the Holy Grail, 1905. An illustration from Stories of King Arthur and the Round Table by Beatrice Clay, 1st Edition, 1905

Background imageBeatrice Clay Collection: Sore was the contest, 1905. Artist: Dora Curtis

Sore was the contest, 1905. Artist: Dora Curtis
Sore was the contest, 1905. An illustration from Stories of King Arthur and the Round Table by Beatrice Clay, 1st Edition, 1905

Background imageBeatrice Clay Collection: A lady weeping bitterly, 1905. Artist: Dora Curtis

A lady weeping bitterly, 1905. Artist: Dora Curtis
A lady weeping bitterly, 1905. An illustration from Stories of King Arthur and the Round Table by Beatrice Clay, 1st Edition, 1905

Background imageBeatrice Clay Collection: Struck him such a blow, 1905. Artist: Dora Curtis

Struck him such a blow, 1905. Artist: Dora Curtis
Struck him such a blow, 1905. An illustration from Stories of King Arthur and the Round Table by Beatrice Clay, 1st Edition, 1905

Background imageBeatrice Clay Collection: As they waiting on the little woodland knoll, 1905. Artist: Dora Curtis

As they waiting on the little woodland knoll, 1905. Artist: Dora Curtis
As they waiting on the little woodland knoll, 1905. An illustration from Stories of King Arthur and the Round Table by Beatrice Clay, 1st Edition, 1905

Background imageBeatrice Clay Collection: The conversion of Sir Palamides, 1905. Artist: Dora Curtis

The conversion of Sir Palamides, 1905. Artist: Dora Curtis
The conversion of Sir Palamides, 1905. Sir Palamedes was a Saracen who converted to Christianity in the Arthurian legend. An illustration from Stories of King Arthur

Background imageBeatrice Clay Collection: At the door of one stood a lady, 1905. Artist: Dora Curtis

At the door of one stood a lady, 1905. Artist: Dora Curtis
At the door of one.. stood a lady, 1905. An illustration from Stories of King Arthur and the Round Table by Beatrice Clay, 1st Edition, 1905

Background imageBeatrice Clay Collection: Palamides appeared before her, 1905. Artist: Dora Curtis

Palamides appeared before her, 1905. Artist: Dora Curtis
Palamides appeared before her, 1905. Palamides was in love with Isolde, which brought trouble between Tristan and Palamides

Background imageBeatrice Clay Collection: King Anguish gives Isolt to Sir Tristram, 1905. Artist: Dora Curtis

King Anguish gives Isolt to Sir Tristram, 1905. Artist: Dora Curtis
King Anguish gives Isolt to Sir Tristram, 1905. An illustration from Stories of King Arthur and the Round Table by Beatrice Clay, 1st Edition, 1905

Background imageBeatrice Clay Collection: How Tristram abode at the court of King Anguish of Ireland, 1905

How Tristram abode at the court of King Anguish of Ireland, 1905. Sir Tristram, Knight of the Round Table, stays with the King of Ireland to bring back his daughter, Iseult, for King Mark

Background imageBeatrice Clay Collection: The Magic Potion, 1905. Artist: Dora Curtis

The Magic Potion, 1905. Artist: Dora Curtis
The Magic Potion, 1905. An illustration from Stories of King Arthur and the Round Table by Beatrice Clay, 1st Edition, 1905

Background imageBeatrice Clay Collection: Put away from you that sword, 1905. Artist: Dora Curtis

Put away from you that sword, 1905. Artist: Dora Curtis
Put away from you that sword, 1905. An illustration from Stories of King Arthur and the Round Table by Beatrice Clay, 1st Edition, 1905

Background imageBeatrice Clay Collection: The Queen cried to him to forbear, 1905. Artist: Dora Curtis

The Queen cried to him to forbear, 1905. Artist: Dora Curtis
The Queen cried to him to forbear, 1905. The Queen tries to poison her stepson Tristram, when her husband nearly drinks the poison instead

Background imageBeatrice Clay Collection: Sir Launcelot, 1905. Artist: Dora Curtis

Sir Launcelot, 1905. Artist: Dora Curtis
Sir Launcelot, 1905. An illustration from Stories of King Arthur and the Round Table by Beatrice Clay, 1st Edition, 1905

Background imageBeatrice Clay Collection: They met with an Old Man, 1905. Artist: Dora Curtis

They met with an Old Man, 1905. Artist: Dora Curtis
They met with an Old Man, 1905. Sir Balan and Sir Balin meet with Merlin, disguised as an old man. An illustration from Stories of King Arthur and the Round Table by Beatrice Clay, 1st Edition, 1905

Background imageBeatrice Clay Collection: Queen Morgan le Fay, 1905. Artist: Dora Curtis

Queen Morgan le Fay, 1905. Artist: Dora Curtis
Queen Morgan le Fay, 1905. An illustration from Stories of King Arthur and the Round Table by Beatrice Clay, 1st Edition, 1905

Background imageBeatrice Clay Collection: She caused the rock to shut down, 1905. Artist: Dora Curtis

She caused the rock to shut down, 1905. Artist: Dora Curtis
She caused the rock to shut down, 1905. Vivien turns on her own master, Merlin, tricking him to enter the rock which she then closes on him

Background imageBeatrice Clay Collection: Morgan le Fay with Excalibur, 1905. Artist: Dora Curtis

Morgan le Fay with Excalibur, 1905. Artist: Dora Curtis
Morgan le Fay with Excalibur, 1905. An illustration from Stories of King Arthur and the Round Table by Beatrice Clay, 1st Edition, 1905

Background imageBeatrice Clay Collection: Annoure brought the King out upon the battlements, 1905. Artist: Dora Curtis

Annoure brought the King out upon the battlements, 1905. Artist: Dora Curtis
Annoure brought the King out upon the battlements, 1905. An illustration from Stories of King Arthur and the Round Table by Beatrice Clay, 1st Edition, 1905


All Professionally Made to Order for Quick Shipping

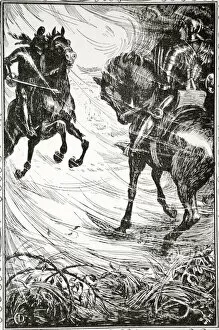
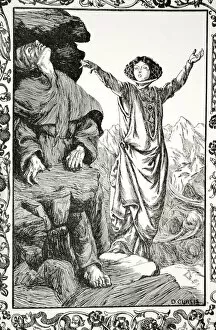
"Beatrice Clay: A Journey through Arthurian Legends" Step into the enchanting world of Arthurian legends as depicted by the talented artist Dora Curtis in her series of captivating paintings. In "Then they went to Sir Galahad, " we witness the noble knight's quest for the Holy Grail, his determination shining through every brushstroke. As we delve deeper, we encounter treachery and betrayal in "How Mordred plotted against Sir Launcelot. " Curtis skillfully portrays the tension and deceit that threaten to tear apart Camelot's harmony. In a tragic turn of events, "Found the Queen Dead" reveals a heart-wrenching scene where Guenevere's lifeless body is discovered. The emotions conveyed by Curtis are palpable, evoking empathy from even the most stoic observer. Amidst these trials and tribulations, hope emerges in "Sir Galahad at the Abbey. " The painting radiates with an ethereal glow as Galahad finds solace within sacred walls while pursuing his divine purpose. "The Three Queens" showcases three powerful women who shape Arthurian destiny – Morgan le Fay, Morgause, and Viviane. Curtis masterfully captures their individuality and influence on this legendary tale. With intensity unparalleled, "Rushed Upon the Astonished Throng" depicts a pivotal moment when knights charge forward fearlessly into battle. Each stroke conveys their unwavering courage amidst chaos and uncertainty. Queen Guenevere takes center stage in all her regal splendor in "Queen Guenevere. " Her beauty shines forth alongside her inner strength as she navigates love triangles and political intrigue with grace befitting a queen. "The Barge floated down the River" transports us to Avalon's mystical shores. Curtis' artistry immerses us in this magical realm where King Arthur journeys towards eternal rest accompanied by mysterious maidens guiding him home.