Fraud Blocker Skip to main content

Sir Tristram Collection

"Sir Tristram: A Tale of Love, Loyalty, and Adventure" In the realm of King Anguish

Background imageSir Tristram Collection: King Anguish gives Isolt to Sir Tristram (litho)

King Anguish gives Isolt to Sir Tristram (litho)
2813811 King Anguish gives Isolt to Sir Tristram (litho) by Curtis, Dora (c.1875-1925); Private Collection; (add.info.: King Anguish gives Isolt to Sir Tristram)

Background imageSir Tristram Collection: Sir Tristram cometh to ye castle of Sir Nabon (litho)

Sir Tristram cometh to ye castle of Sir Nabon (litho)
2781847 Sir Tristram cometh to ye castle of Sir Nabon (litho) by Pyle, Howard (1853-1911) (after); Private Collection; (add.info.: Sir Tristram cometh to ye castle of Sir Nabon)

Background imageSir Tristram Collection: Belle Isoult and Sir Tristram drink the love draught (litho)

Belle Isoult and Sir Tristram drink the love draught (litho)
2781845 Belle Isoult and Sir Tristram drink the love draught (litho) by Pyle, Howard (1853-1911) (after); Private Collection; (add.info.: Belle Isoult and Sir Tristram drink the love draught)

Background imageSir Tristram Collection: Sir Tristram harpeth before King Mark (litho)

Sir Tristram harpeth before King Mark (litho)
2781843 Sir Tristram harpeth before King Mark (litho) by Pyle, Howard (1853-1911) (after); Private Collection; (add.info.: Sir Tristram harpeth before King Mark)

Background imageSir Tristram Collection: King Anguish gives Isolt to Sir Tristram, illustration from

King Anguish gives Isolt to Sir Tristram, illustration from
STC323618 King Anguish gives Isolt to Sir Tristram, illustration from Stories of King Arthur and the Round Table by Beatrice Clay, 1st Edition, 1905 (litho) by Curtis

Background imageSir Tristram Collection: The Queen cried to him to forbear, illustration from

The Queen cried to him to forbear, illustration from
STC323615 The Queen cried to him to forbear, illustration from Stories of King Arthur and the Round Table by Beatrice Clay, 1st Edition, 1905 (litho) by Curtis

Background imageSir Tristram Collection: The Witch gives Advice as to Sir Tristrams Wound, from

The Witch gives Advice as to Sir Tristrams Wound, from
STC323730 The Witch gives Advice as to Sir Tristrams Wound, from Stories of the Knights of the Round Table by Henry Gilbert, first edition, 1911 (colour litho) by Crane

Background imageSir Tristram Collection: Tristram succors the Lady Moeya, illustration from

Tristram succors the Lady Moeya, illustration from
STC335733 Tristram succors the Lady Moeya, illustration from The Story of the Champions of the Round Table (litho) by Pyle, Howard (1853-1911); Private Collection; The Stapleton Collection; American

Background imageSir Tristram Collection: How Tristram abode at the court of King Anguish of Ireland

How Tristram abode at the court of King Anguish of Ireland
STC323616 How Tristram abode at the court of King Anguish of Ireland, illustration from Stories of King Arthur and the Round Table by Beatrice Clay, 1st Edition, 1905 (litho) by Curtis

Background imageSir Tristram Collection: Sir Tristram leaps into ye Sea (litho)

Sir Tristram leaps into ye Sea (litho)
2781851 Sir Tristram leaps into ye Sea (litho) by Pyle, Howard (1853-1911) (after); Private Collection; (add.info.: Sir Tristram leaps into ye Sea)

Background imageSir Tristram Collection: The Queen of Ireland seeks to slay Sir Tristram (litho)

The Queen of Ireland seeks to slay Sir Tristram (litho)
2781842 The Queen of Ireland seeks to slay Sir Tristram (litho) by Pyle, Howard (1853-1911) (after); Private Collection; (add.info.: The Queen of Ireland seeks to slay Sir Tristram)

Background imageSir Tristram Collection: A Trumpeter (engraving)

A Trumpeter (engraving)
1620600 A Trumpeter (engraving) by Cattermole, Charles (1832-1900) (after); Private Collection; (add.info.: A Trumpeter. Illustration for The Illustrated London News, 12 October 1867)

Background imageSir Tristram Collection: Sir Tristram sits with Sir Launcelot (litho)

Sir Tristram sits with Sir Launcelot (litho)
2781844 Sir Tristram sits with Sir Launcelot (litho) by Pyle, Howard (1853-1911) (after); Private Collection; (add.info.: Sir Tristram sits with Sir Launcelot)

Background imageSir Tristram Collection: Palamides appeared before her, illustration from Stories of King Arthur

Palamides appeared before her, illustration from Stories of King Arthur
STC323619 Palamides appeared before her, illustration from Stories of King Arthur and the Round Table by Beatrice Clay, 1st Edition, 1905 (litho) by Curtis

Background imageSir Tristram Collection: Hospitality, the Admission of Sir Tristram to the Fellowship of the Round Table (engraving)

Hospitality, the Admission of Sir Tristram to the Fellowship of the Round Table (engraving)
1613455 Hospitality, the Admission of Sir Tristram to the Fellowship of the Round Table (engraving) by English School, (19th century); Private Collection; (add.info.: Hospitality)

Background imageSir Tristram Collection: Courtesy, Sir Tristram harping to La Belle Isoude (engraving)

Courtesy, Sir Tristram harping to La Belle Isoude (engraving)
1610150 Courtesy, Sir Tristram harping to La Belle Isoude (engraving) by Dyce, William (1806-64) (after); Private Collection; (add.info.: Courtesy, Sir Tristram harping to La Belle Isoude)

Background imageSir Tristram Collection: Sir Tristram assaults King Mark (litho)

Sir Tristram assaults King Mark (litho)
2781849 Sir Tristram assaults King Mark (litho) by Pyle, Howard (1853-1911) (after); Private Collection; (add.info.: Sir Tristram assaults King Mark)

Background imageSir Tristram Collection: Sir Kay and the Forest Madman, illustration from The Story of the Champions of

Sir Kay and the Forest Madman, illustration from The Story of the Champions of
STC335744 Sir Kay and the Forest Madman, illustration from The Story of the Champions of the Round Table (litho) by Pyle, Howard (1853-1911); Private Collection; The Stapleton Collection; American

Background imageSir Tristram Collection: Death of Sir Tristram, c1864. Creator: Ford Madox Brown

Death of Sir Tristram, c1864. Creator: Ford Madox Brown
Death of Sir Tristram, c1864

Background imageSir Tristram Collection: The Witch gives Advice as to Sir Tristrams Wound, 1911

The Witch gives Advice as to Sir Tristrams Wound, 1911. How Sir Tristram kept his word. From Stories of the Knights of the Round Table by Henry Gilbert, first edition, 1911

Background imageSir Tristram Collection: King Anguish gives Isolt to Sir Tristram, 1905. Artist: Dora Curtis

King Anguish gives Isolt to Sir Tristram, 1905. Artist: Dora Curtis
King Anguish gives Isolt to Sir Tristram, 1905. An illustration from Stories of King Arthur and the Round Table by Beatrice Clay, 1st Edition, 1905

Background imageSir Tristram Collection: How Tristram abode at the court of King Anguish of Ireland, 1905

How Tristram abode at the court of King Anguish of Ireland, 1905. Sir Tristram, Knight of the Round Table, stays with the King of Ireland to bring back his daughter, Iseult, for King Mark


All Professionally Made to Order for Quick Shipping

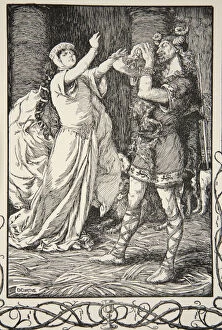
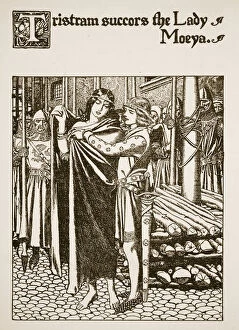
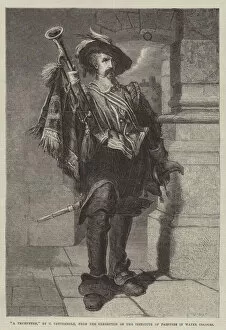
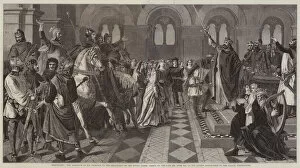
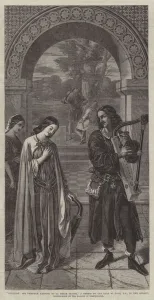
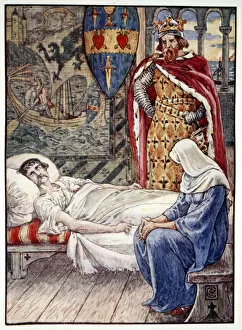
"Sir Tristram: A Tale of Love, Loyalty, and Adventure" In the realm of King Anguish, a fateful decision was made as he bestowed his beloved daughter Isolt to the valiant knight Sir Tristram. The lithograph captures the moment when their destinies intertwined, forever altering their lives. Journeying through treacherous lands, Sir Tristram arrived at the formidable castle of Sir Nabon. With unwavering courage and skillful prowess, he overcame every obstacle that stood in his path. The lithograph portrays this epic encounter between two noble warriors. Love's intoxicating elixir united Belle Isoult and Sir Tristram as they drank from its enchanted cup. This lithograph immortalizes their passionate union amidst swirling emotions and entangled hearts. The enchanting melodies flowing from Sir Tristram's harp mesmerized all who listened. Even King Mark himself couldn't resist being captivated by the knight's musical prowess. The lithograph depicts this captivating scene where music transcends boundaries and touches souls. Once again, King Anguish played a pivotal role as he gifted Isolt to Sir Tristram in another illustration from 'Tristan and Iseult. ' Meanwhile, Queen Iseult pleaded with him to cease his actions in yet another gripping portrayal from this timeless tale. Amidst perilous times, wise counsel came forth as The Witch imparted her advice on healing Sir Tristram's wounds in an engraving that showcases her mystical powers aiding our gallant hero. Ever chivalrous and compassionate towards damsels in distress, Sir Tristram rushed to Lady Moeya's aid when she found herself trapped within danger’s clutches. This vividly depicted illustration highlights his unwavering dedication to protecting those in need. At the court of King Anguish of Ireland did our noble protagonist find solace during tumultuous times - a sanctuary where honor and valor thrived.