Home > Europe > United Kingdom > England > London > Transport > Stations
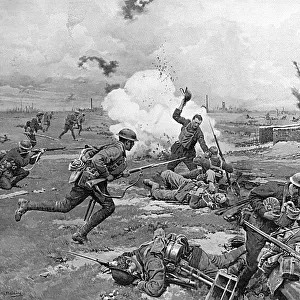
Scenes in Ladysmith after the Siege (b / w photo)
")
![]()
Wall Art and Photo Gifts from Fine Art Finder
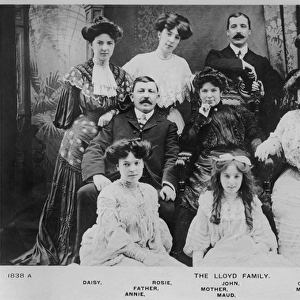
Scenes in Ladysmith after the Siege (b / w photo)
1599543 Scenes in Ladysmith after the Siege (b/w photo) by English Photographer, (20th century); Private Collection; (add.info.: Scenes in Ladysmith after the Siege. Illustration for The Illustrated London News, 21 April 1900.
English Photographer (20th Century)); Look and Learn / Illustrated Papers Collection
Media ID 23399780
© Look and Learn / Illustrated Papers Collection / Bridgeman Images
Bidding Contingent Departure Entraining Farewell Forming General Buller Gordons Guard Of Honour Ladysmith Leaving Railway Station Second Boer War Siege Sir George White Witnessing Hms Terrible
FEATURES IN THESE COLLECTIONS
> Africa
> South Africa
> Related Images
> Arts
> Artists
> W
> George White
> Europe
> United Kingdom
> England
> London
> Transport
> Railway
> Europe
> United Kingdom
> England
> London
> Transport
> Stations
> Fine Art Finder
> Artists
> English Photographer
> Fine Art Finder
> Artists
> English School
EDITORS COMMENTS
This print captures the poignant scenes in Ladysmith after the Siege during the Second Boer War. Taken by an English photographer in the 20th century, this historical image is part of a private collection. The photograph depicts a contingent forming a guard of honor to bid farewell and witness the departure of General Buller and Sir George White. The atmosphere at the railway station is filled with mixed emotions as soldiers prepare to leave Ladysmith on board HMS Terrible. The Gordons, along with other military personnel, can be seen entraining for their journey away from this war-torn South African town. The aftermath of the siege is evident in every detail captured by this skilled photographer's lens. The worn-out buildings and weary faces tell stories of resilience and sacrifice endured during those challenging times. This photograph offers us a glimpse into history, reminding us of the courage displayed by those who fought in this conflict. It serves as a testament to human strength amidst adversity and stands as an important document of that era. Displayed within Fine Art Finder's collection, courtesy of Bridgeman Images, this powerful image allows us to reflect upon our shared past while honoring those who played their part in shaping it.
MADE IN AUSTRALIA
Safe Shipping with 30 Day Money Back Guarantee
FREE PERSONALISATION*
We are proud to offer a range of customisation features including Personalised Captions, Color Filters and Picture Zoom Tools
SECURE PAYMENTS
We happily accept a wide range of payment options so you can pay for the things you need in the way that is most convenient for you
* Options may vary by product and licensing agreement. Zoomed Pictures can be adjusted in the Cart.