Home > Europe > United Kingdom > England > London > Hospitals
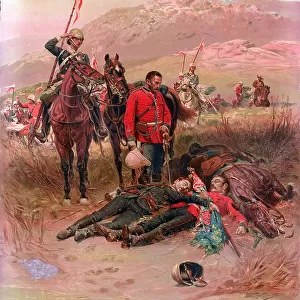
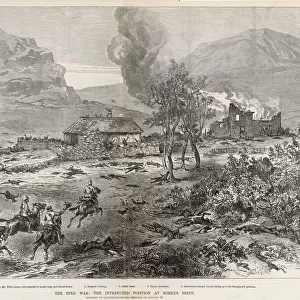
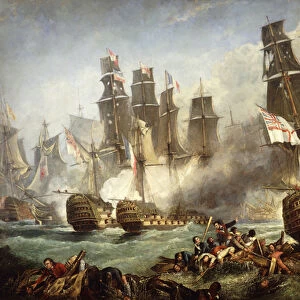
Sketch of the Positions of the Forces engaged at Isandula, 22 January (engraving)
")
![]()
Wall Art and Photo Gifts from Fine Art Finder
Sketch of the Positions of the Forces engaged at Isandula, 22 January (engraving)
1106557 Sketch of the Positions of the Forces engaged at Isandula, 22 January (engraving) by English School, (19th century); Private Collection; (add.info.: Sketch of the Positions of the Forces engaged at Isandula, 22 January. Illustration for The Illustrated London News, 8 March 1879.); Look and Learn / Illustrated Papers Collection; English, out of copyright
Media ID 23048180
© Look and Learn / Illustrated Papers Collection / Bridgeman Images
24th Regiment Anglo Zulu War Battalion Buffalo River Drift Enemy Engaged Forces Hospital Position Positions Rorkes Drift Survivors 22 January Isandula
FEATURES IN THESE COLLECTIONS
> Africa
> South Africa
> Related Images
> Arts
> Artists
> Related Images
> Arts
> Landscape paintings
> Waterfall and river artworks
> River artworks
> Europe
> United Kingdom
> England
> London
> Hospitals
> Fine Art Finder
> Artists
> English School
> Fine Art Finder
> Temp Classification
EDITORS COMMENTS
This engraving titled "Sketch of the Positions of the Forces engaged at Isandula, 22 January" takes us back to a significant moment in history during the Anglo-Zulu War. The image showcases a detailed topographical sketch depicting the positions and movements of various forces on that fateful day. The scene unfolds with Lieutenant Chard's battalion strategically positioned near Buffalo River, while Colonel Durnford's native contingent holds their ground at Rorke's Drift. The enemy forces are shown advancing towards these key locations, creating an intense atmosphere filled with anticipation and tension. As we study this print, we can't help but feel a sense of admiration for those brave soldiers who fought valiantly against all odds. The survivors' determination is palpable as they defend their positions amidst chaos and uncertainty. This artwork not only serves as a historical record but also highlights the importance of strategic positioning in warfare. It allows us to gain insight into the challenges faced by both sides during this conflict in South Africa. With its intricate details and accurate representation, this engraving offers viewers an opportunity to immerse themselves in one of history's most significant battles. It reminds us of the sacrifices made by those involved and encourages reflection on the impact such conflicts have had on shaping our world today.
MADE IN AUSTRALIA
Safe Shipping with 30 Day Money Back Guarantee
FREE PERSONALISATION*
We are proud to offer a range of customisation features including Personalised Captions, Color Filters and Picture Zoom Tools
SECURE PAYMENTS
We happily accept a wide range of payment options so you can pay for the things you need in the way that is most convenient for you
* Options may vary by product and licensing agreement. Zoomed Pictures can be adjusted in the Cart.