Home > Europe > United Kingdom > England > London > Transport > Stations
The Transvaal War, Scenes at the Seat of Operations (litho)
")
![]()
Wall Art and Photo Gifts from Fine Art Finder
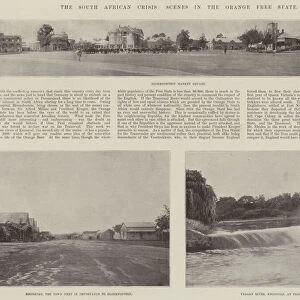
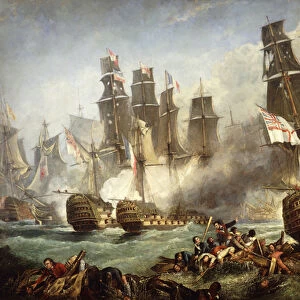
The Transvaal War, Scenes at the Seat of Operations (litho)
1592777 The Transvaal War, Scenes at the Seat of Operations (litho) by Holland Tringham, Joseph (1861-1908); Private Collection; (add.info.: The Transvaal War, Scenes at the Seat of Operations. Illustration for The Illustrated London News, 21 October 1899.
Holland Tringham); Look and Learn / Illustrated Papers Collection
Media ID 22314876
© Look and Learn / Illustrated Papers Collection / Bridgeman Images
Banks Orange Free State Orange River Transvaal War
FEATURES IN THESE COLLECTIONS
> Africa
> South Africa
> Related Images
> Arts
> Artists
> Related Images
> Arts
> Landscape paintings
> Waterfall and river artworks
> River artworks
> Europe
> United Kingdom
> England
> London
> Transport
> Railway
> Europe
> United Kingdom
> England
> London
> Transport
> Stations
> Fine Art Finder
> Artists
> English School
> Fine Art Finder
> Artists
> Joseph Holland Tringham
EDITORS COMMENTS
This print titled "The Transvaal War, Scenes at the Seat of Operations" takes us back to a significant moment in history. Created by Joseph Holland Tringham, this lithograph captures the essence of the Transvaal War and offers a glimpse into life at the seat of operations. The image showcases various scenes that depict the harsh realities faced during this conflict. From the bustling Mafeking railway station to the serene Wesleyan mission station, each detail tells a story of resilience and determination. The orange Free State and Orange River serve as powerful symbols representing both hope and struggle. As we explore further, we are transported to Aliwal North, where banks stand tall amidst chaotic surroundings. The primitive Methodist church stands as a beacon of faith amidst turmoil while nearby Dutch smithies echo with sounds of craftsmanship. This engraving not only portrays topography but also serves as an invaluable historical document capturing pivotal moments in time. It allows us to reflect on the bravery and sacrifices made by those involved in this war. Preserved within private collections, this artwork is part of Look and Learn's Illustrated Papers Collection. Bridgeman Images has brought it forward for our appreciation today. As we gaze upon this print, let us remember its significance in understanding our past and honoring those who fought for their beliefs during times of uncertainty.
MADE IN AUSTRALIA
Safe Shipping with 30 Day Money Back Guarantee
FREE PERSONALISATION*
We are proud to offer a range of customisation features including Personalised Captions, Color Filters and Picture Zoom Tools
SECURE PAYMENTS
We happily accept a wide range of payment options so you can pay for the things you need in the way that is most convenient for you
* Options may vary by product and licensing agreement. Zoomed Pictures can be adjusted in the Cart.