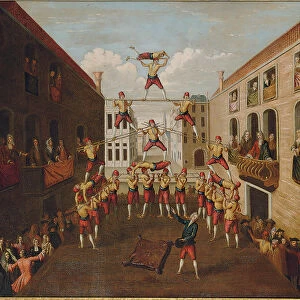
Home > Africa > South Africa > Pretoria
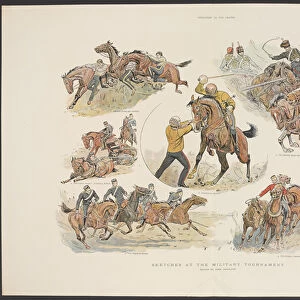
Colonel Plumers attempt to relieve Mafeking (litho)
")
![]()
Wall Art and Photo Gifts from Fine Art Finder
Colonel Plumers attempt to relieve Mafeking (litho)
3623456 Colonel Plumers attempt to relieve Mafeking (litho) by Dadd, Frank (1851-1929) (after); Private Collection; (add.info.: Colonel Plumers attempt to relieve Mafeking. Illustration for With The Flag To Pretoria by H W Wilson (Harmsworth, 1900).); © Look and Learn
Media ID 22983704
© Look and Learn / Bridgeman Images
Attempt Boer War Boers Collision Force Mafeking Mounted Relieve Retire Wars Colonel Plumer Injuries Wound Wounded
FEATURES IN THESE COLLECTIONS
> Africa
> South Africa
> Pretoria
> Arts
> Artists
> Related Images
> Fine Art Finder
> Artists
> Frank (after) Dadd
> Fine Art Finder
> Artists
> John (after) Charlton
EDITORS COMMENTS
This lithograph, titled "Colonel Plumer's Attempt to Relieve Mafeking" transports us back to the tumultuous days of the Boer War in South Africa. Created by Frank Dadd and now part of a private collection, this print captures a pivotal moment in history. The scene unfolds with intense energy as mounted soldiers clash amidst the chaos of battle. Colonel Plumer leads his forces forward, determined to relieve the besieged town of Mafeking. The air is thick with tension and anticipation as both sides collide with fierce determination. Intriguingly, this illustration originates from H. W Wilson's book "With The Flag To Pretoria" (Harmsworth, 1900), providing a visual representation of an important event during that time. As we gaze at this engraving, we can almost feel the urgency and desperation felt by those involved. The image also serves as a poignant reminder of the human cost of war. Wounded soldiers lie scattered across the battlefield, their injuries evident and their pain palpable. It highlights not only physical wounds but also underscores the importance of medicine and healthcare during times of conflict. Through this lithograph, we are transported into history - witnessing bravery, sacrifice, and resilience firsthand. It stands as a testament to the indomitable spirit displayed by individuals like Colonel Plumer who fought valiantly for what they believed in. As we reflect on this powerful artwork from Bridgeman Images' Fine Art Finder collection, let us remember those
MADE IN AUSTRALIA
Safe Shipping with 30 Day Money Back Guarantee
FREE PERSONALISATION*
We are proud to offer a range of customisation features including Personalised Captions, Color Filters and Picture Zoom Tools
SECURE PAYMENTS
We happily accept a wide range of payment options so you can pay for the things you need in the way that is most convenient for you
* Options may vary by product and licensing agreement. Zoomed Pictures can be adjusted in the Cart.