Home > Arts > Artists > A > John White Alexander
The Last Crossing: Tragic End of the Rebel Beyers while trying to Cross the Vaal River, 1916

![]()
Wall Art and Photo Gifts from Heritage Images
The Last Crossing: Tragic End of the Rebel Beyers while trying to Cross the Vaal River, 1916
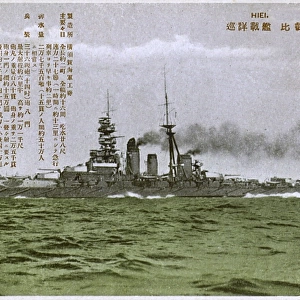
The Last Crossing: Tragic End of the Rebel Beyers while trying to Cross the Vaal River, 1916. Christian Frederick Beyers drowned in the Vaal River while attempting to escape with a few of his men on December 9th, 1914. From " The War Illustrated Album De Luxe - Volume IV. The Summer Campaign - 1915", edited by J. A. Hammerton. [The Amalgamated Press, Limited, London, 1916]
Heritage Images features heritage image collections
Media ID 19661297
© The Print Collector/Heritage Images
Album Amalgamated Press Amalgamated Press Limited Amalgamated Press Ltd Arial View Boer Boers Crossing Elevated View Escape Escaping Hammerton Hammerton J A Hammerton Ja Hammerton Sir John Alexander J A Hammerton Ja Hammerton John Hammerton Mounted Rebel River Vaal Sir John Alexander Sir John Alexander Hammerton Sir John Hammerton South Africa South African Summer Campaign 1915 The Amalgamated Press The War Illustrated Tragic Trapped Vaal River 1st World War Wartime
FEATURES IN THESE COLLECTIONS
> Africa
> South Africa
> Related Images
> Arts
> Artists
> A
> John White Alexander
> Arts
> Artists
> W
> John White
> Arts
> Landscape paintings
> Waterfall and river artworks
> Landscape paintings
> Historic
> World War I and II
> World War I
> Historic
> World War I and II
The Last Crossing - Tragic End of the Rebel Beyers while trying to Cross the Vaal River, 1916
EDITORS COMMENTS
. This haunting print captures a somber moment in history during the tumultuous times of World War I. The image depicts an aerial view of the Vaal River in South Africa, where Christian Frederick Beyers, a prominent Boer rebel leader, met his tragic end on December 9th, 1914. Mounted on horseback with a small group of loyal men by his side, Beyers attempted to escape across the treacherous river but was overcome by its powerful currents. The photograph showcases the vastness and beauty of the landscape surrounding this fateful crossing point. The image is taken from "The War Illustrated Album De Luxe - Volume IV. The Summer Campaign - 1915", edited by J. A. Hammerton. It serves as a poignant reminder of the sacrifices made during wartime and highlights one man's desperate attempt for freedom amidst conflict. As we gaze upon this historical artifact, we are reminded not only of Beyers' rebellion against British rule but also of the larger narrative unfolding during that era. This photograph offers us a glimpse into a specific moment frozen in time – capturing both tragedy and resilience. Through this visual record preserved over a century ago, we are transported back to an era defined by courage and struggle as nations fought for their independence. It stands as a testament to human determination and serves as an enduring symbol of remembrance for those who lost their lives in pursuit of liberty.
MADE IN AUSTRALIA
Safe Shipping with 30 Day Money Back Guarantee
FREE PERSONALISATION*
We are proud to offer a range of customisation features including Personalised Captions, Color Filters and Picture Zoom Tools
SECURE PAYMENTS
We happily accept a wide range of payment options so you can pay for the things you need in the way that is most convenient for you
* Options may vary by product and licensing agreement. Zoomed Pictures can be adjusted in the Cart.