Home > Africa > South Africa > Cape Town
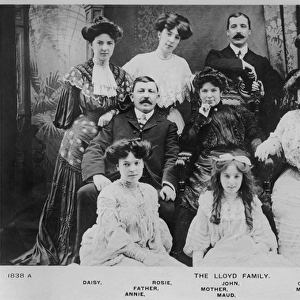
Cape Town bidding Farewell to Canadian and Australian Troops (b / w photo)
")
![]()
Wall Art and Photo Gifts from Fine Art Finder
Cape Town bidding Farewell to Canadian and Australian Troops (b / w photo)
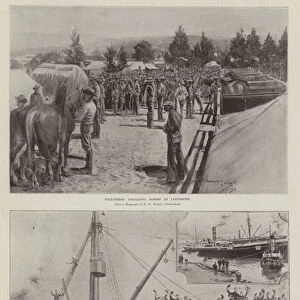
1593185 Cape Town bidding Farewell to Canadian and Australian Troops (b/w photo) by English Photographer, (20th century); Private Collection; (add.info.: Cape Town bidding Farewell to Canadian and Australian Troops. Illustration for The Illustrated London News, 12 January 1901.
English Photographer (20th Century)); Look and Learn / Illustrated Papers Collection
Media ID 22552616
© Look and Learn / Illustrated Papers Collection / Bridgeman Images
Bidding Cape Town Farewell Second Boer War
FEATURES IN THESE COLLECTIONS
> Africa
> South Africa
> Cape Town
> Arts
> Artists
> Related Images
> Fine Art Finder
> Artists
> English Photographer
EDITORS COMMENTS
This photograph captures a poignant moment in history as Cape Town bids farewell to Canadian and Australian troops during the Second Boer War. Taken by an English photographer in the 20th century, this print is now part of a private collection. The image showcases a solemn ceremonial event, filled with emotion and camaraderie. The soldiers stand tall, their uniforms proudly displaying their nationalities. As they prepare to depart for battle, the people of Cape Town gather to bid them farewell. The atmosphere is both somber and celebratory, reflecting the gravity of war but also acknowledging the bravery and sacrifice of these brave men. The composition beautifully captures the essence of this historic occasion - from the expressions on faces etched with determination to waving hands bidding adieu. It serves as a reminder not only of the hardships faced by those involved in conflicts but also highlights the unity among nations during times of crisis. Published in The Illustrated London News on January 12th, 1901, this photograph offers us a glimpse into an important chapter in South African history. It stands as a testament to human resilience and pays tribute to all those who served their countries selflessly. As we gaze upon this remarkable piece captured through photography's lens over a century ago, let us remember those who fought bravely for freedom and honor their memory forevermore.
MADE IN AUSTRALIA
Safe Shipping with 30 Day Money Back Guarantee
FREE PERSONALISATION*
We are proud to offer a range of customisation features including Personalised Captions, Color Filters and Picture Zoom Tools
SECURE PAYMENTS
We happily accept a wide range of payment options so you can pay for the things you need in the way that is most convenient for you
* Options may vary by product and licensing agreement. Zoomed Pictures can be adjusted in the Cart.