
British Empire Maps Collection (#10)
British Empire Maps were a collection of maps and charts that depicted the vast territories under British rule during the height of its empire
656 Items


All Professionally Made to Order for Quick Shipping
-
British Empire Maps Collection
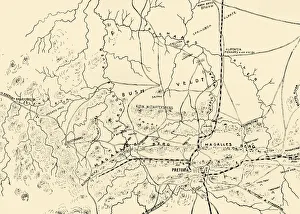
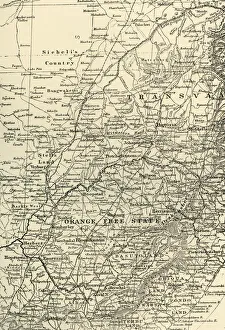
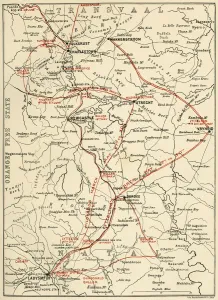
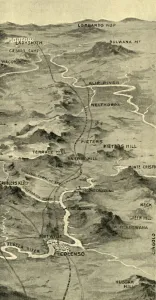
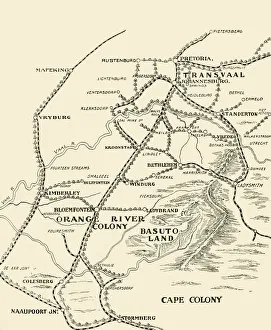
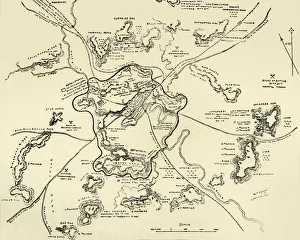
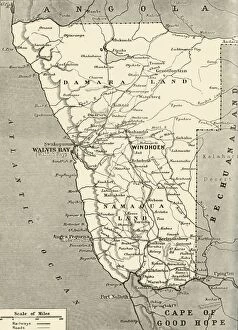
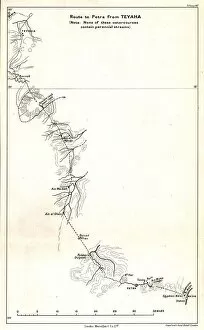
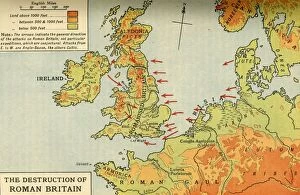
British Empire Maps were a collection of maps and charts that depicted the vast territories under British rule during the height of its empire. These maps were created by cartographers, explorers, and military personnel who documented their findings on land, sea, and air. They provided valuable information for navigation, trade routes, colonization efforts, and military strategy. The maps also reflected the political power dynamics of the time as they showed how Britain controlled large parts of Africa, Asia, North America, Australia and New Zealand. Today these maps are important historical artifacts that offer insights into colonialism's impact on indigenous peoples' lives and cultures around the world.
+
Our beautiful Wall Art and Photo Gifts include Framed Prints, Photo Prints, Poster Prints, Canvas Prints, Jigsaw Puzzles, Metal Prints and so much more
The British Empire Maps collection is a fascinating assortment of maps and charts that depict the vastness and complexity of the British Empire during its peak. Our collection , available through our wall art and framed prints, offers a glimpse into the history of one of the most powerful empires in world history. From detailed maps showcasing trade routes to colorful illustrations depicting colonial territories, our collection provides an insight into how Britain once ruled over much of the world. The maps are beautifully crafted with intricate details that capture the essence of each region under British rule. Whether you're interested in exploring historical geography or simply looking for unique decor for your home or office space, our collection has something for everyone. With high-quality printing techniques used on premium paper stock, these prints are sure to make a statement wherever they are displayed. The British Empire Maps collection from Media Storehouse is an excellent resource for anyone seeking to learn about or celebrate Britain's imperial past.
+
What are British Empire Maps (Maps and Charts) art prints?
British Empire Maps art prints are a collection of historical maps and charts that depict the vast territories once controlled by the British Empire. These art prints showcase the intricate details of various regions, including coastlines, rivers, mountains, cities, and other landmarks. They also feature important trade routes and shipping lanes that were crucial to the expansion of the British Empire. These maps and charts were originally created for navigational purposes or as tools for military strategy during colonial times. Today they serve as fascinating pieces of artwork that offer a glimpse into our shared history. Each print is carefully reproduced using high-quality printing techniques to ensure that every detail is captured accurately. Whether you're a history buff or simply appreciate beautiful artwork, these British Empire Maps art prints are sure to impress. They make great additions to any home or office space and are perfect conversation starters for guests who admire them.
+
What British Empire Maps (Maps and Charts) art prints can I buy from Media Storehouse?
We offer a wide range of British Empire Maps art prints that you can purchase. These maps showcase the vastness and diversity of the British Empire during its peak, covering various regions such as Africa, Asia, Australia, Canada, India, New Zealand and more. You can choose from different styles of maps including antique or vintage designs that add a touch of nostalgia to your home decor. The collection includes detailed topographical maps as well as political maps showing the territories under British rule at different points in history. Whether you are interested in exploring historical geography or simply looking for unique wall art to decorate your space with an imperial theme, we have something for everyone. With high-quality printing techniques used on premium paper stock materials, these prints will make a lasting impression on any viewer.
+
How do I buy British Empire Maps (Maps and Charts) art prints?
To buy British Empire Maps art prints from Media Storehouse, you can browse our extensive collection of vintage maps and charts online. Once you have found the print that you want to purchase, simply add it to your cart and proceed to checkout. You will be prompted to enter your shipping information and payment details. We offer a variety of sizes for their art prints, so make sure to select the size that best fits your needs. We also offer framing options if you prefer a ready-to-hang piece of artwork. Our collection includes maps from various time periods in the history of the British Empire, including colonial America, India, Africa, Australia and New Zealand. These maps are not only beautiful pieces of art but also serve as historical documents that provide insight into past political boundaries and cultural landscapes. Buying British Empire Maps art prints from Media Storehouse is an easy process that allows you to bring a piece of history into your home or office space.
+
How much do British Empire Maps (Maps and Charts) art prints cost?
We offer a wide range of British Empire Maps art prints at varying prices. Our collection includes vintage maps from the 18th and 19th centuries as well as more modern reproductions. The cost of each print depends on factors such as size, framing options, and the specific map or chart chosen. We take pride in offering high-quality prints that are perfect for home decor or office spaces. Each print is carefully crafted using premium materials to ensure longevity and durability. Whether you're looking for a unique gift or a stunning addition to your own collection, our selection of British Empire Maps art prints has something for everyone. With so many options available, you're sure to find the perfect piece at an affordable price point that suits your budget.
+
How will my British Empire Maps (Maps and Charts) art prints be delivered to me?
We take pride in delivering your British Empire Maps art prints with utmost care. We use high-quality packaging materials to ensure that your print arrives in perfect condition. Your print will be carefully rolled and placed into a sturdy cardboard tube for protection during transit. We work with trusted delivery partners who offer reliable shipping services worldwide. Once your order has been dispatched, you will receive a tracking number so you can monitor the progress of your delivery. Our team is dedicated to ensuring that all orders are processed efficiently and delivered promptly. If you have any questions or concerns about the delivery of your British Empire Maps art prints, please do not hesitate to contact us. We are always happy to help.